Hello new people! No doubt, you’re a budding photographer. If you weren’t you probably wouldn’t be here reading this article. Since you are here, you apparently have questions about photography and you’re probably seeking out some photography advice. Indeed, there’s a lot of photography advice out there, especially online. There’s so much advice that you cannot possibly apply it all to your photography. However, there’s a lot of online photography advice out there which you need to beware of. So, now let’s talk about some of the advice out there and why you should beware of it.
Quick Disclaimer

Let’s start things off by saying not all online photography advice is bad. Some online photography advice is good and well worth taking. Indeed, I provide such advice myself in my Photo Tips articles. However, you must also consider that most of those giving said online advice are not there to observe your process and coach you as necessary (myself included). Those who are available for coaching often charge fees for their services. This is one good reason to beware of online photography advice: you usually can’t receive quick or easy feedback tailored for you from the advice giver.
I may also add that several of these points below are topics I’ve seen and heard about discussed and debated online. There are many opinions. However, there’s no right or wrong answer to them. Rather, the question is more of whether or not it’s the right time for you as a photographer to explore them for yourself as they often involve more advanced knowledge and techniques.
Finally, as a landscape photographer myself, my portfolio naturally skews that direction. However, the advice contained here applies across the board. You can apply it to your photography, no matter what you shoot. Also, I’ll list all of these discussion points in no particular order. Now, let’s get into it.
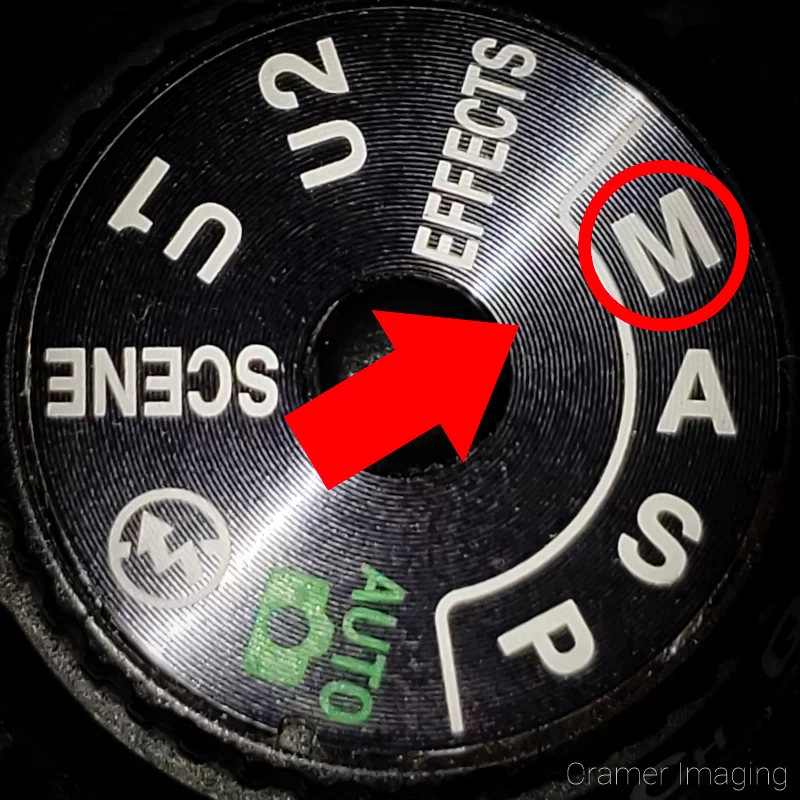
Manual Mode Only
No doubt, if you spend enough time in online photography circles, you will run into photographers advising the use manual mode exclusively in your photography. We tend to call such photographers “manual mode purists” in the industry. Indeed, manual mode certainly has its place in photography. However, beware of this often-online photography advice. Manual mode only is an expert level skill which is not for beginners.
The Argument
The purists will argue that using manual mode will give you complete creative control over the exposure; and they are right. By choosing manual mode, you are not relying at all on the camera’s computer to choose a camera setting for you (something which it can, but does not often, get wrong). You can add art, drama, and feeling into a photo where the computer is programmed to give the most balanced exposure possible. Manual mode also means that you are personally responsible for all of how the photo turns out: both the good and the bad. For example: it’s so easy to underexpose or overexpose an image in manual mode.
Indeed, most beginner photographers are not yet ready to take the training wheels off and run with manual mode only. Some never arrive there by choice or otherwise, which is just fine as well. After all, you don’t have to run with manual mode only if you don’t want to.
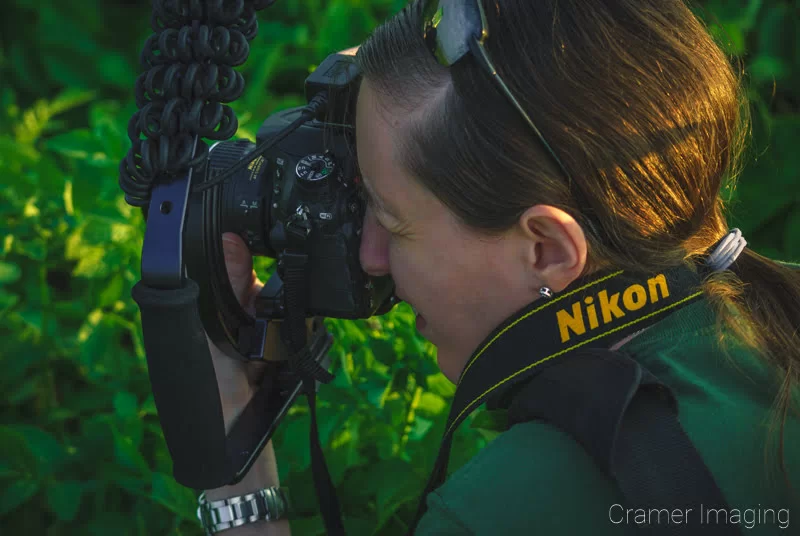
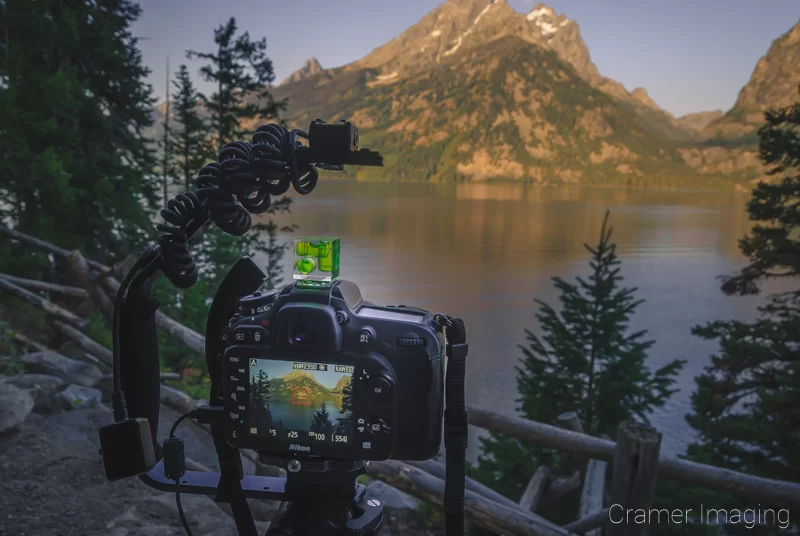
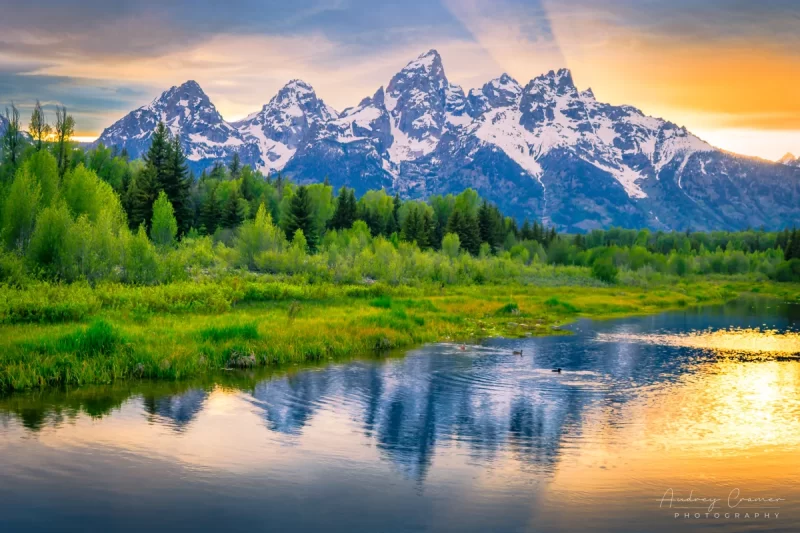
At time of writing, I’m a professional landscape photographer and I rarely use manual mode. I haven’t trained myself to use manual mode exclusively and I don’t think I will. Still, I take photos like these below using aperture or shutter priority mode.
How to Make It Work
In order to make manual mode work in your photography, you need to learn the exposure triangle super well. You need to know exactly how to manipulate the triangle for the light you have on scene. This knowledge does not come quickly. It comes through experience and experimentation. As a beginner and budding photographer, you do not have this knowledge YET. Whether or not you will eventually have it is entirely up to you. However, going manual mode only so early in your photography career will continually yield disappointing results until you master the exposure triangle to a level which many current industry pros do not aspire. At such a time and with such knowledge, you are no longer a beginner photographer.
Buy Prints
Buy Prints
Indeed, there’s nothing wrong with manual mode purists. They master photography in ways which make them much more versatile than the rest who use PAS modes (though usually not program mode). However, as stated before, this approach is not for beginner photographers but is rather an approach for much more advanced photographers to try.
Examples of Use
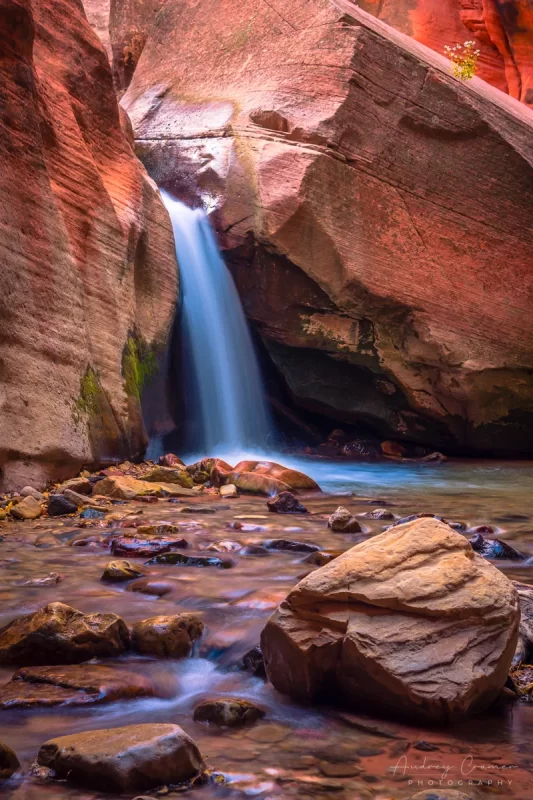
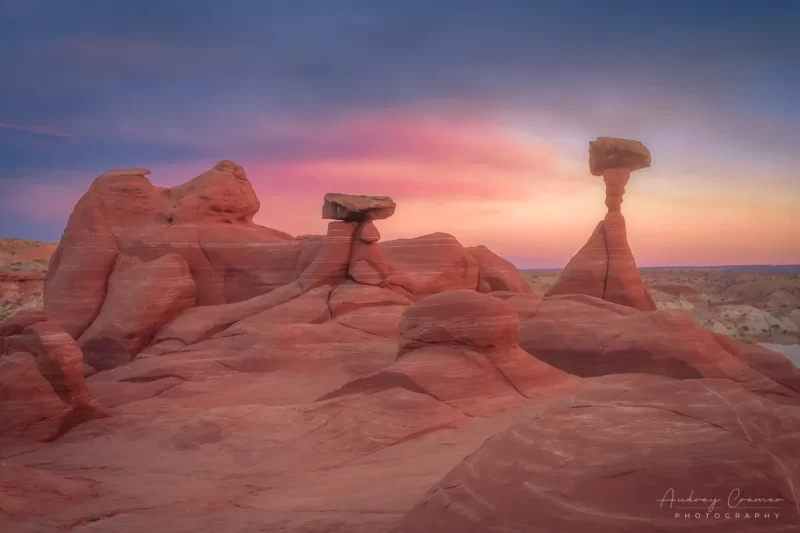
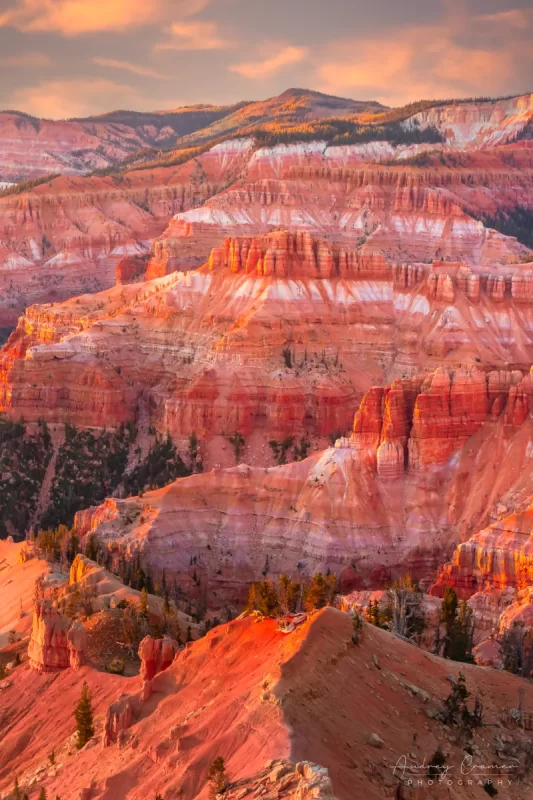
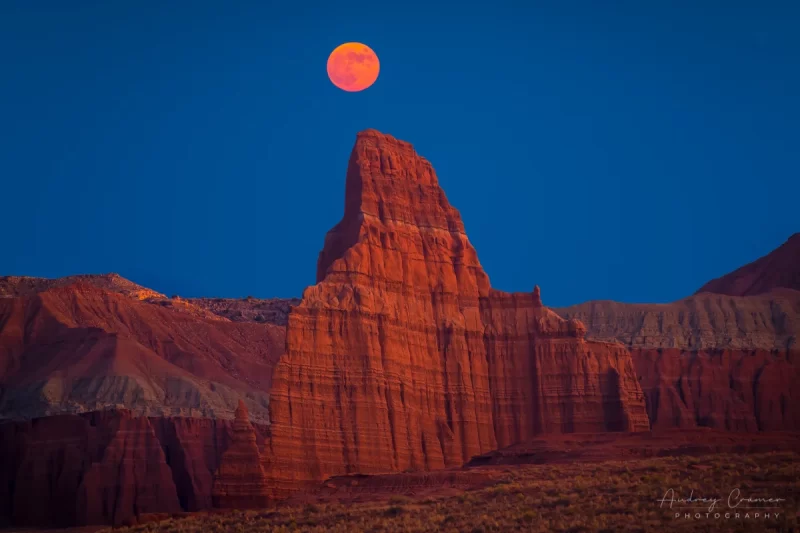
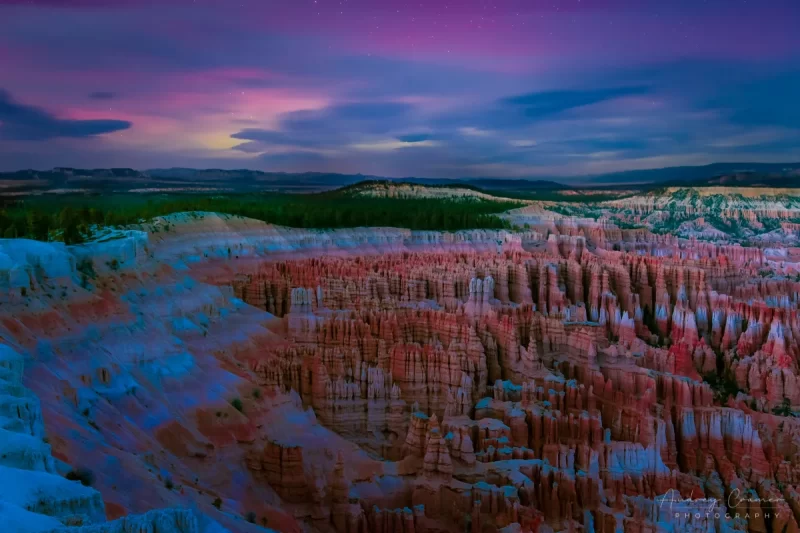
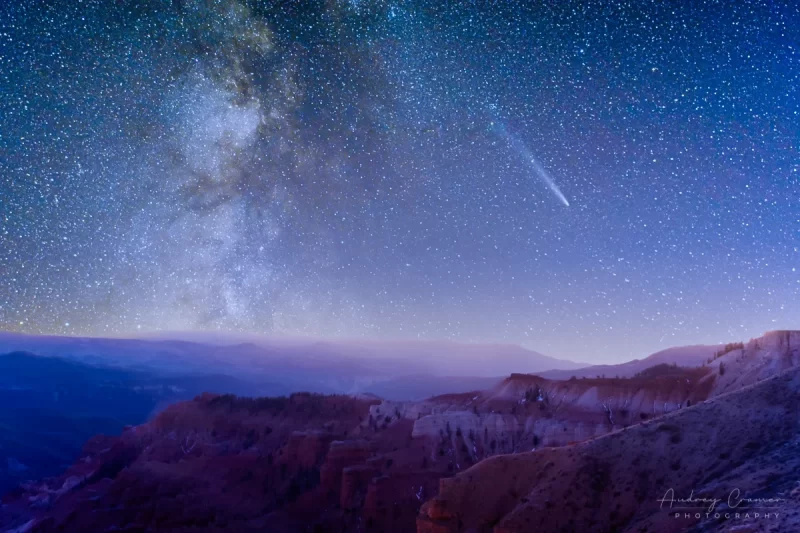
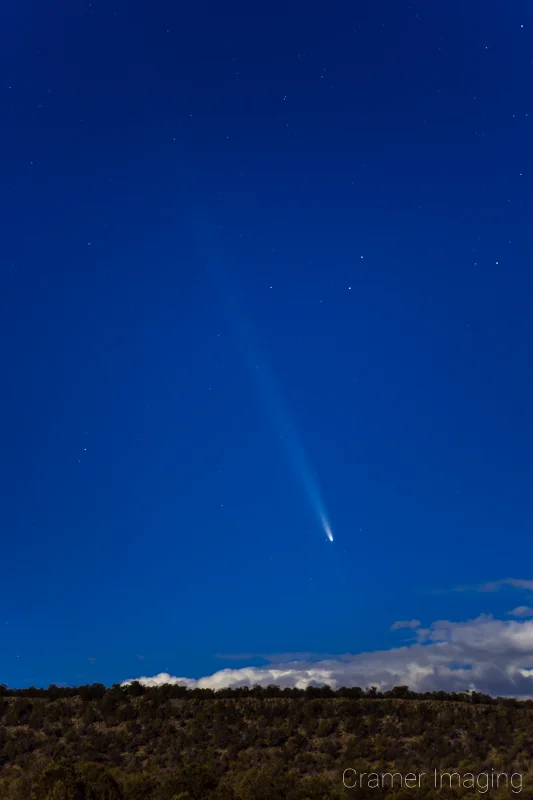
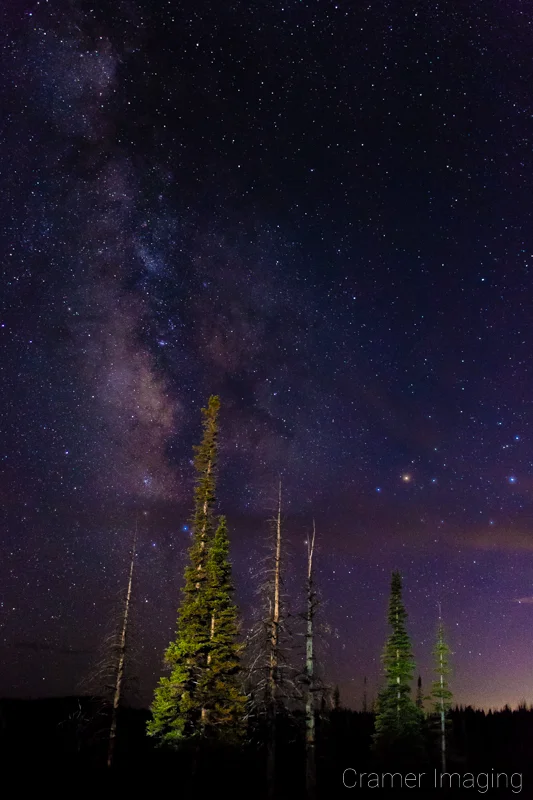
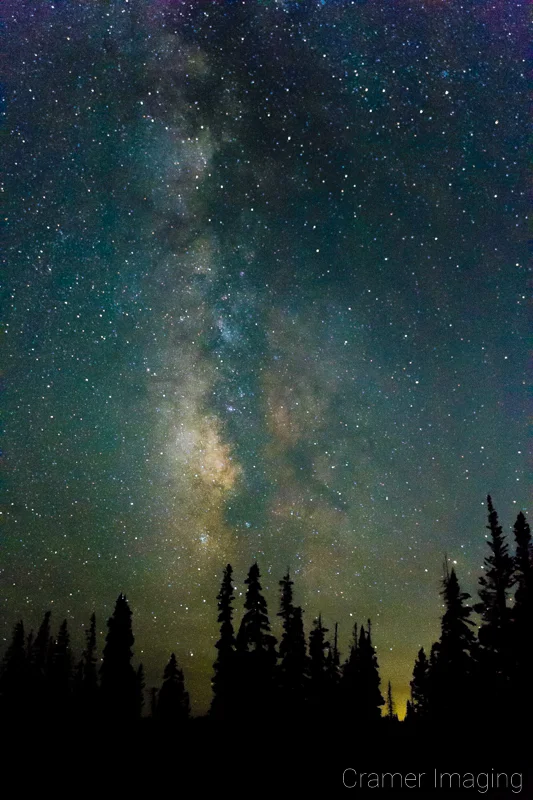
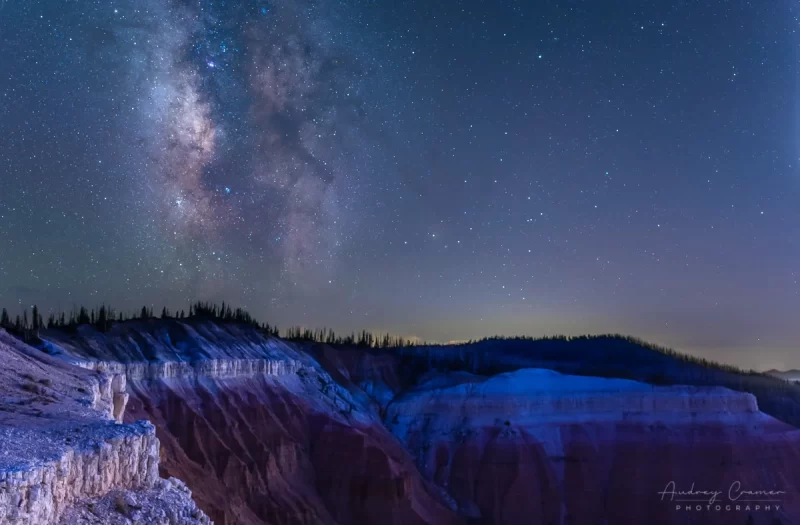
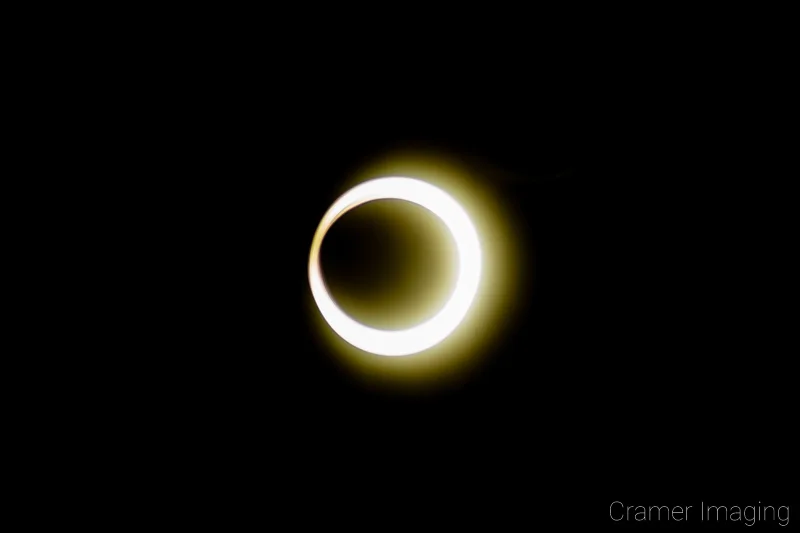
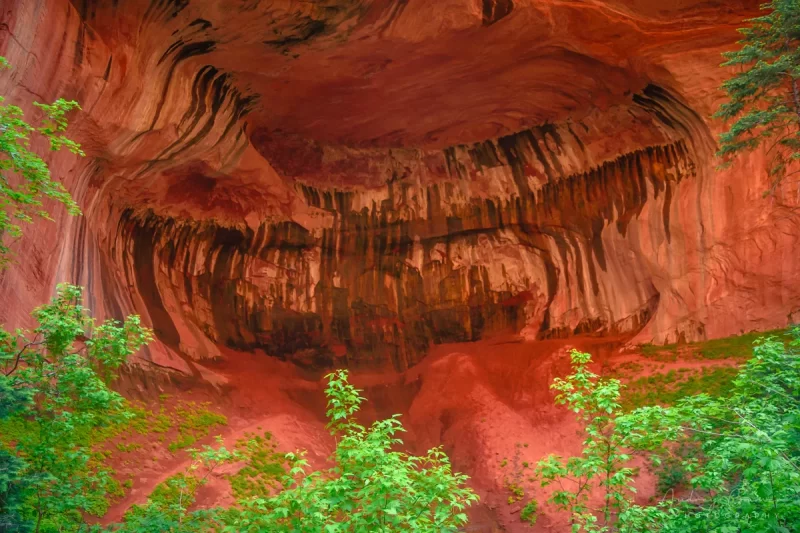
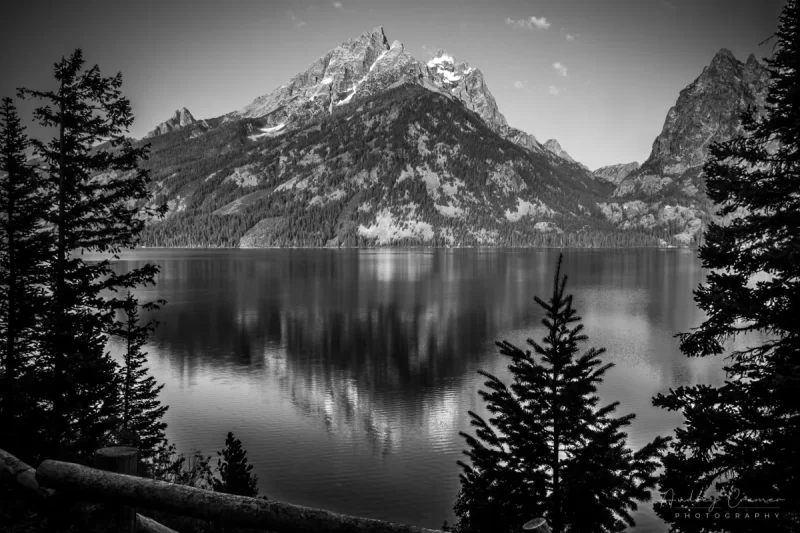
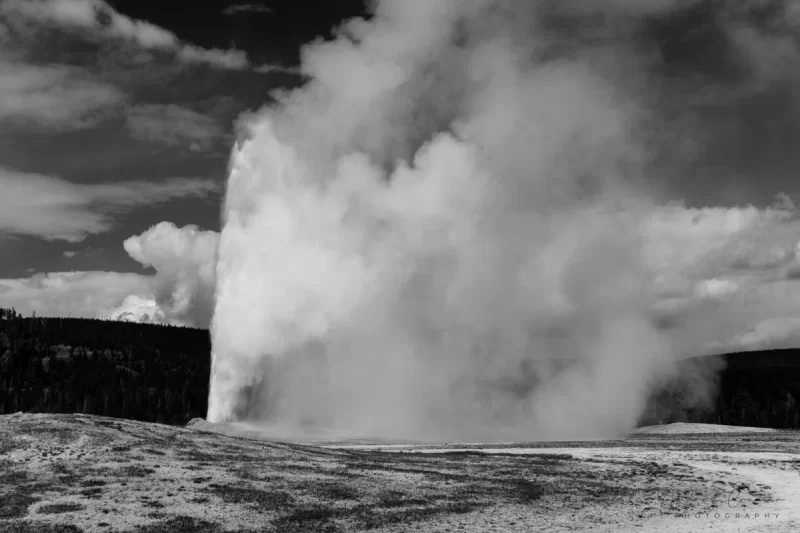
Once you have some more experience under your belt as a photographer, then feel free to try out manual mode only. Indeed, there are types of photography where you can only use manual mode. One such example is astrophotography. I could not capture these photos below using program mode, aperture priority mode, or shutter priority mode. It simply won’t work.
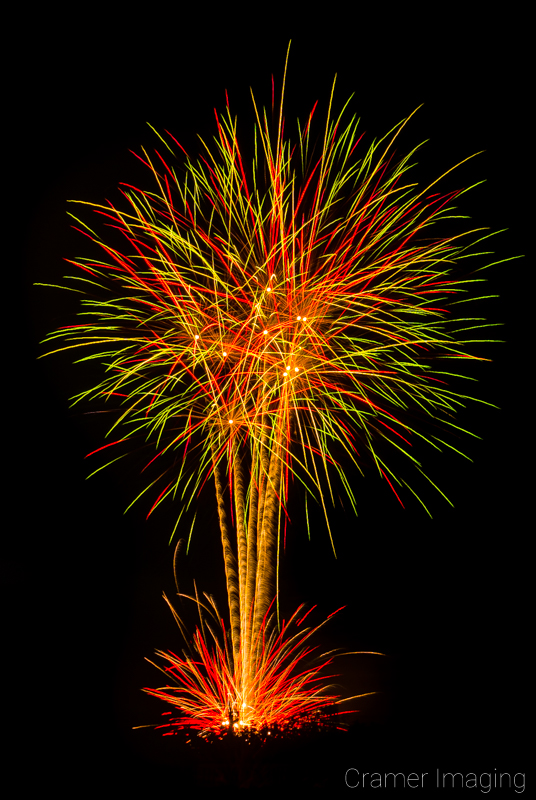
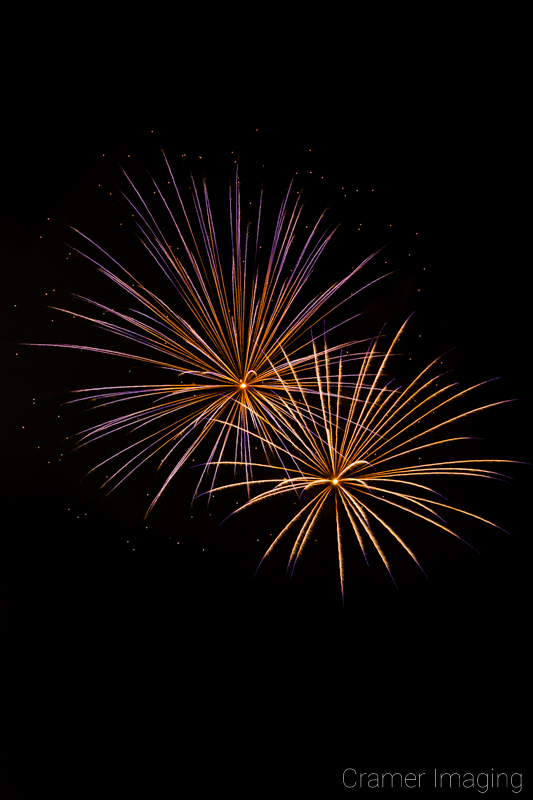
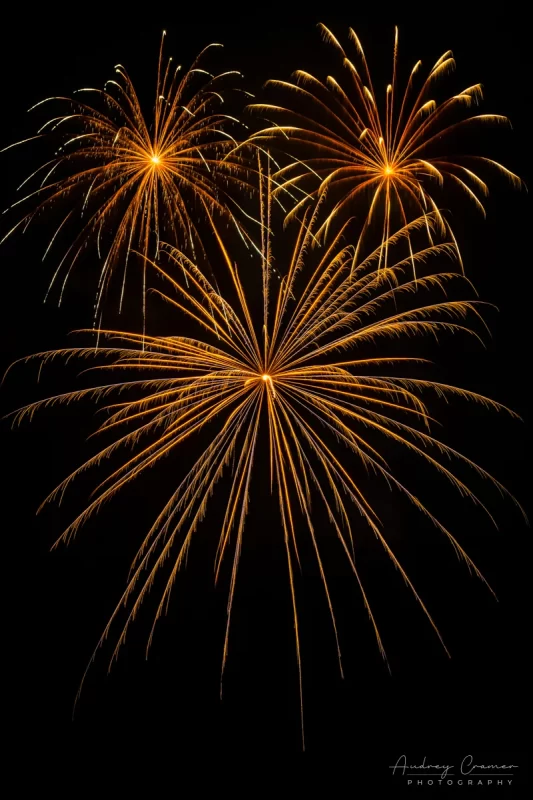
You also need manual mode in order to properly capture firework photos. In fact, you may also require a cable release or a remote trigger as well. However, firework photos like these won’t turn out right without manual mode.
Your Takeaway
Instead of trying manual mode exclusively as a beginner photographer, start off using the P, A, and S modes of PASM modes first. Once you’re producing consistently good photos, then you can decide to try manual mode only and stand a better chance of succeeding. So, beware of this photography advice, especially from online sources, until such time as you are ready. Then, feel free to try it out for yourself.
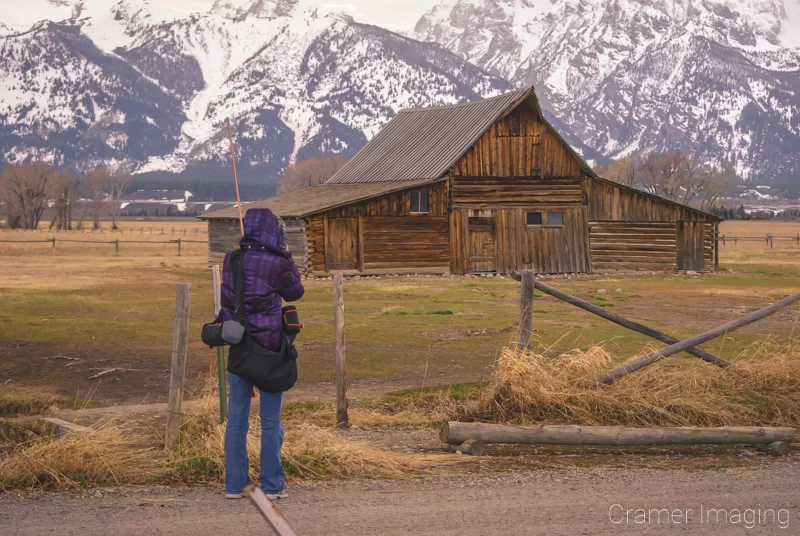
Zoom with Your Feet
Another piece of photography advice you will run into online is that of “zoom with your feet.” The idea is that you move your body closer or further away from you subject in order to zoom in or out. You don’t use the zoom ring. You use your feet instead. However, you do need to beware of this photography advice, so often found online, too. Zooming with your feet is only situationally appropriate. There are also inappropriate times too.
The Argument
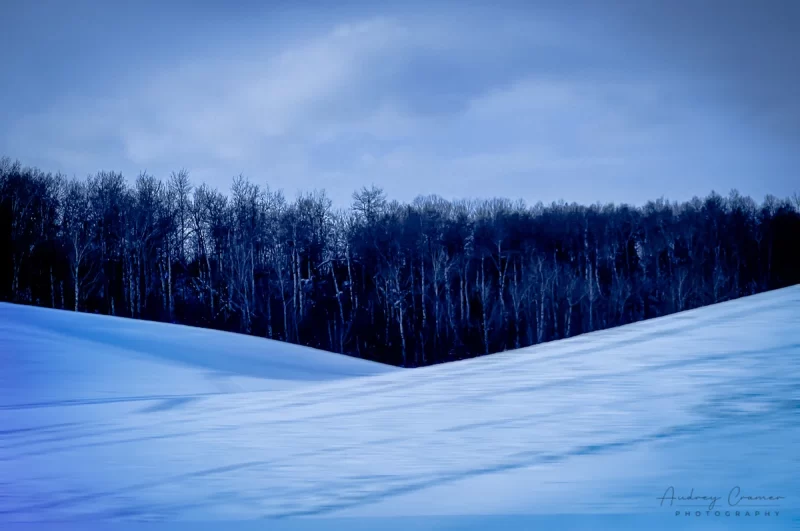
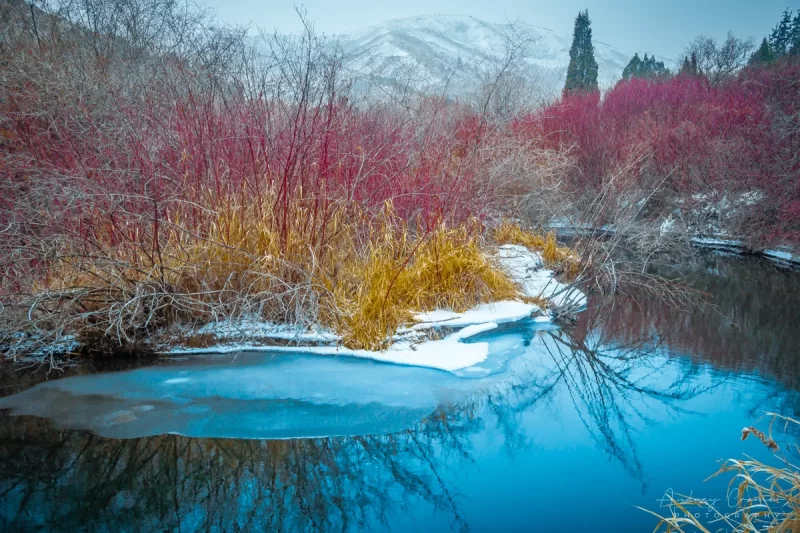
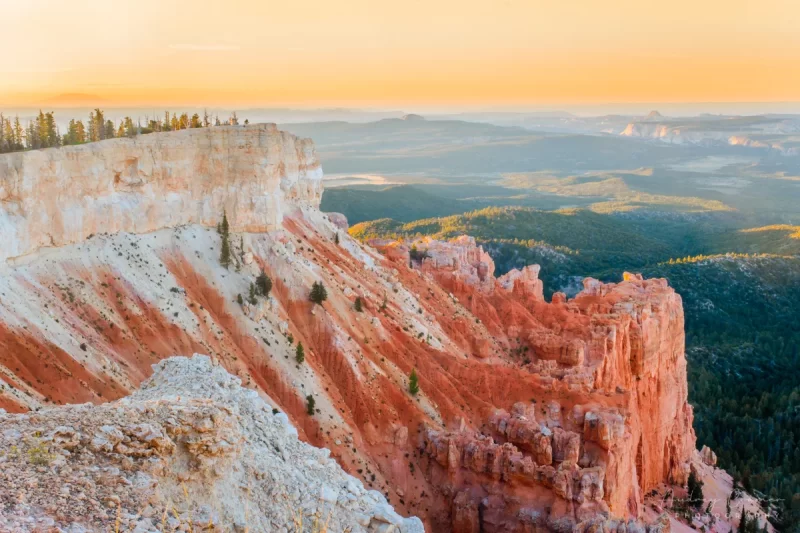
Indeed, in landscape photography, zooming with your feet is often the best policy. Much of the time, you can indeed zoom with your feet. If you zoom with your feet while using a zoom lens, then you still have greater control over what appears in frame. Using feet first leaves the option of optical zoom if feet aren’t enough. Here are some photos which I took while zooming with my feet.
The Counter Argument
On the other hand, there are times, even in landscape photography, where you cannot zoom with your feet. There are plenty of situations in other genres of photography as well. Here are a few situations where I can think of zooming with your feet being inappropriate or otherwise inadvisable.
Buy Prints

You may think of other situations where zooming with your feet might be problematic. However, situations like these are why you need to beware of this piece of online photography advice.
A Note About Prime Lenses
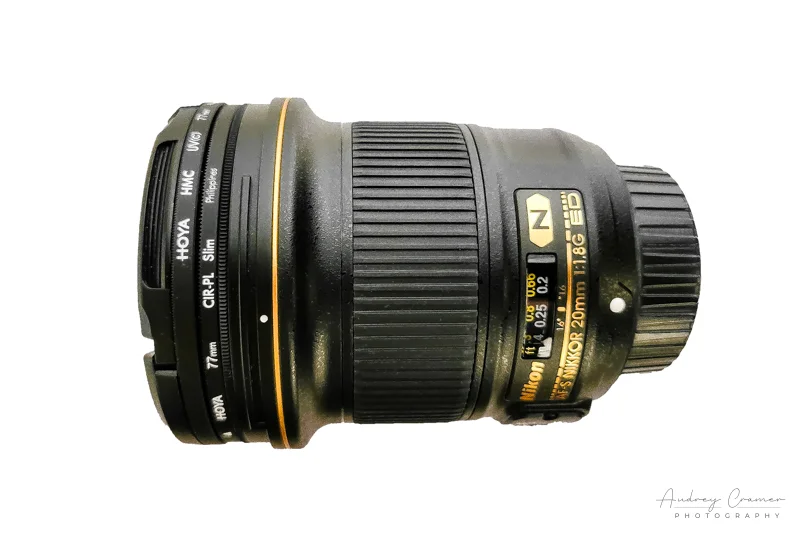
On a side note, I’m aware that, when it comes to prime lenses, your only choice is to zoom with your feet. However, use your best judgment of the situation when it comes to your photography, prime lenses, and zooming with your feet.
Your Takeaway
Zooming with your feet is sometimes appropriate in photography. Sometimes it is not. Other times it is downright dangerous to do so. Please consider carefully before you apply this photography advice to your photo shoot.
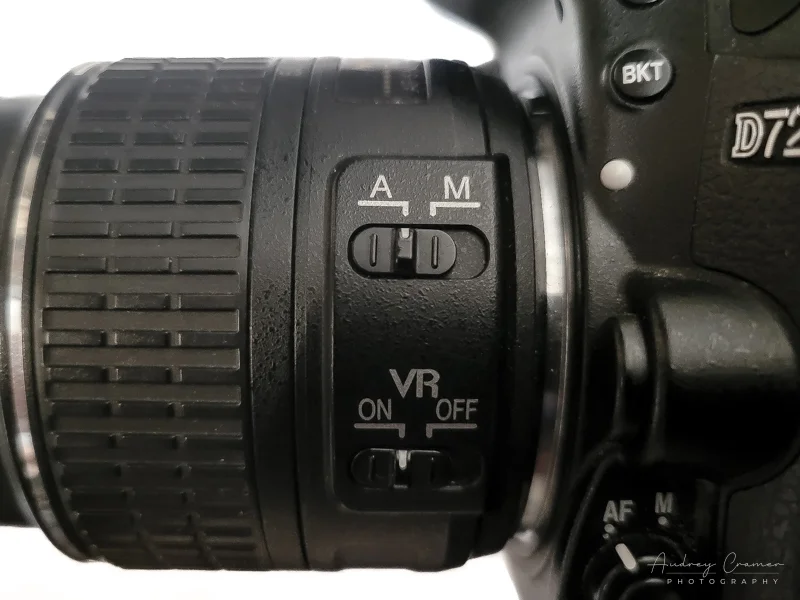
Use Manual Focus
This particular piece of photography advice is not as prevalent as its counterpart of manual mode only. However, it does exist out there for photographers who find it (it’s not hidden, just not as heavily discussed or debated). Just like manual mode, manual focus also has its place in photography. But, once again, you do need to beware of this photography advice, especially from online sources. Manual focus, just like manual mode, is an expert level skill and not for beginners.
The Argument
As this topic is not so heavily debated, you don’t see arguments built up around either side very much at all. However, they still do exist. Using manual focus is another way to take full creative control over your photos. When manually focusing, you can indeed choose what is in focus and what is not while not shifting your framing. Indeed, you can choose to focus on nothing if you so desire. With the right subject matter, it can really work.
Photos like these above are simply not possible without manual focus. I’m glad it exists.
The Counter Argument
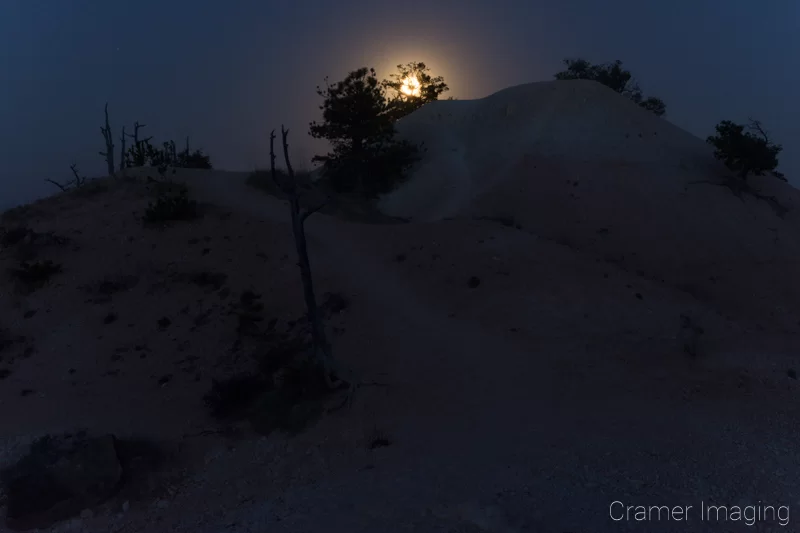
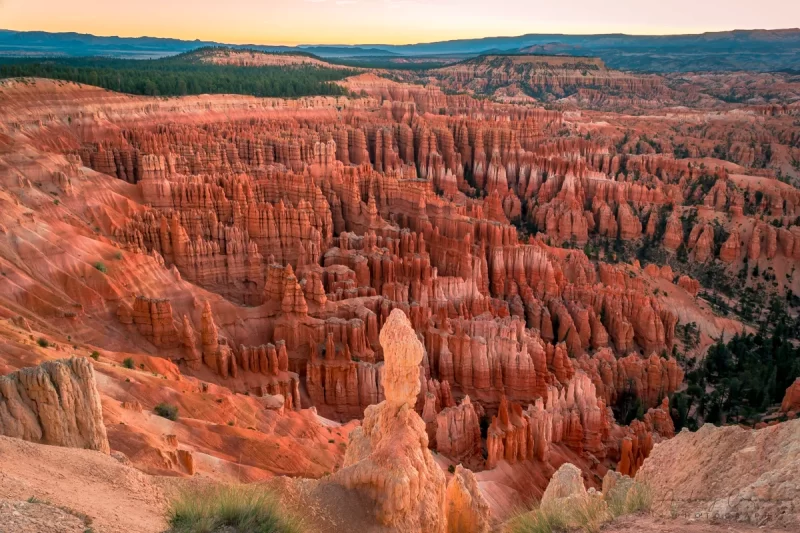
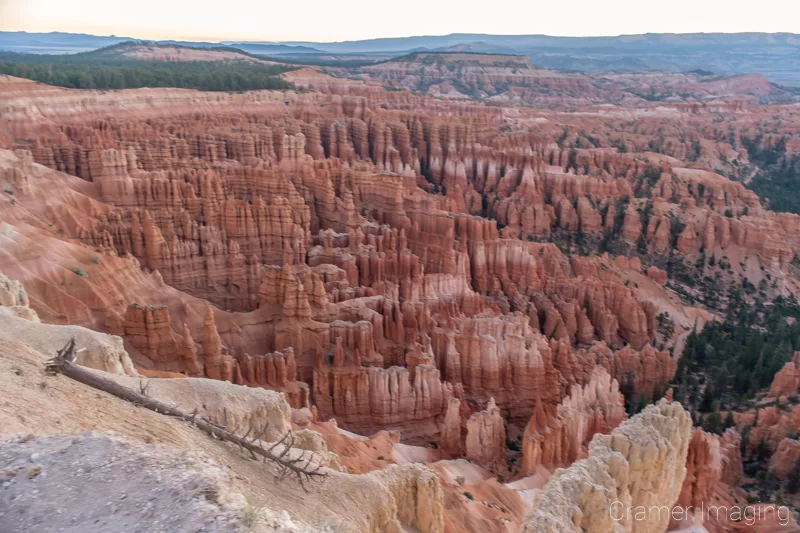
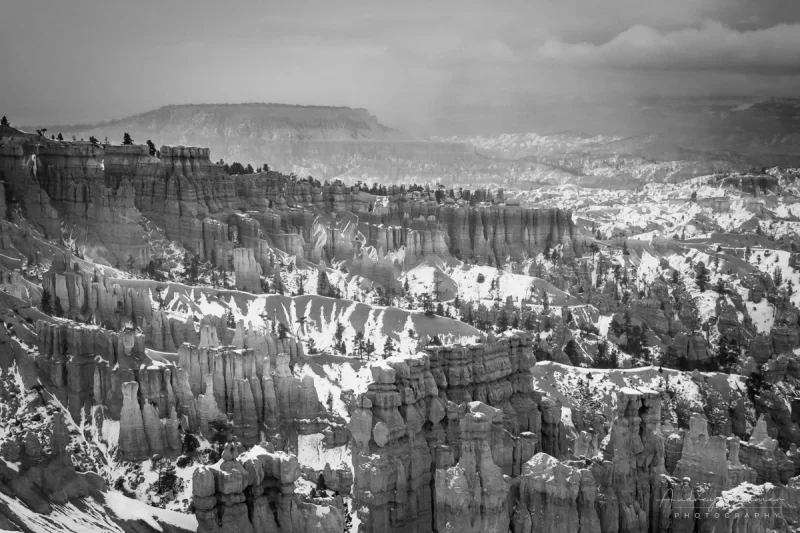
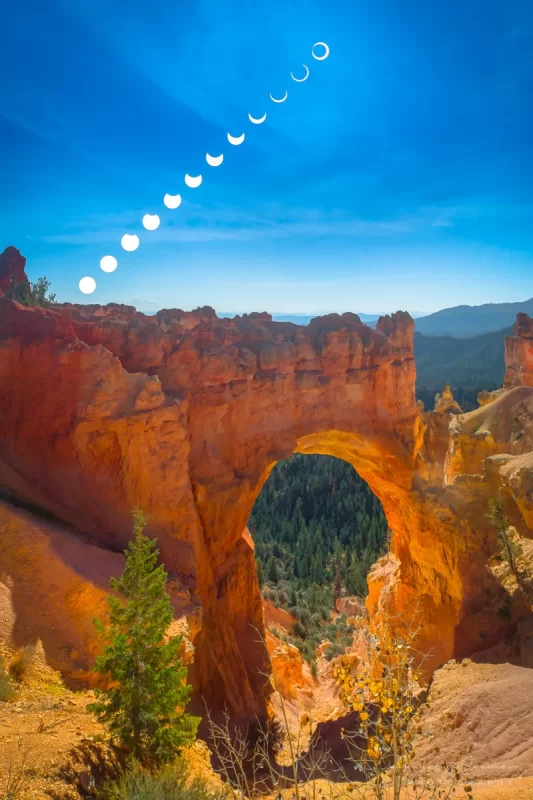
On the other hand, manual focus is very touchy. A single accidental touch at the wrong time can spell disaster for you photo’s focus. Auto focus does not have this problem as it locks the focus ring for you. As long as you don’t half press the shutter or use the back focus button again, or move, you need not worry about losing focus. Some photographers use tape to try and hold the focus ring in place when using manual focus. Image focus is THAT delicate. Check out this example below.
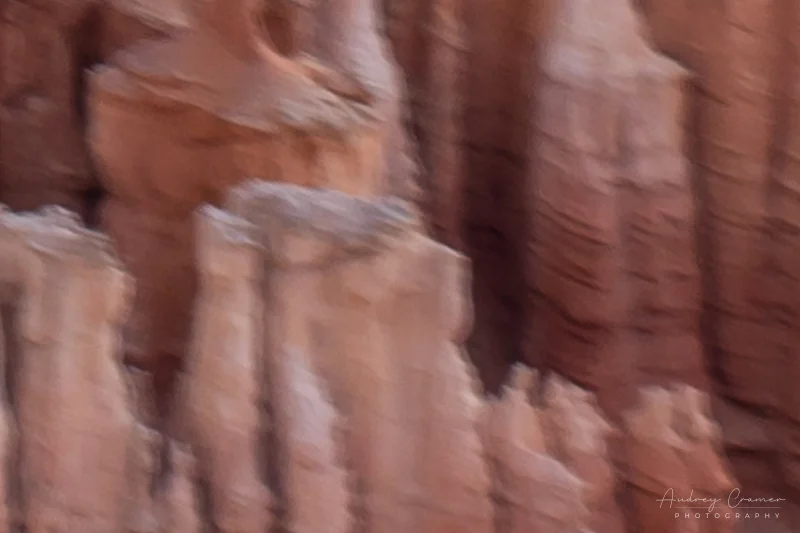
Imagine coming home, after long distance travel to Bryce Canyon, and coming back with photos like this example above. It’s super disappointing. That’s what manual focus can do to your photos if you don’t know what you’re doing. If you’re not ready for manual focus, then beware of this photography advice, especially online. Indeed, auto focus will work well. You can focus and re-frame (or recompose) to make sure that you nail that focus perfectly.
How to Make It Work
If you want to make manual focus work, using today’s cameras, then you must use the screen and digital zoom it offers. You must zoom in with Live View and seek an edge. There must be enough contrast that you can differentiate where the edge is.
Once you’ve found this edge, then you spin the focus ring until the edge becomes as small and as crisply clean as possible. Please be aware that it’s super easy to overshoot. Once you’ve found that sweet spot, you stop. You’ve found your optimal focus. You may now shoot your photos. Try not to bump things in the process of shooting as this delicate focus is easily lost.
Examples of Use
Using manual focus, you can focus the stars at night. These are conditions too dark for auto focus to work. I’ve tried. The focus ring just spins in and out without doing any good. With manual focus and zooming on your screen, you can bring stars into pinpoints of light which matches what we see them as using our eyes.
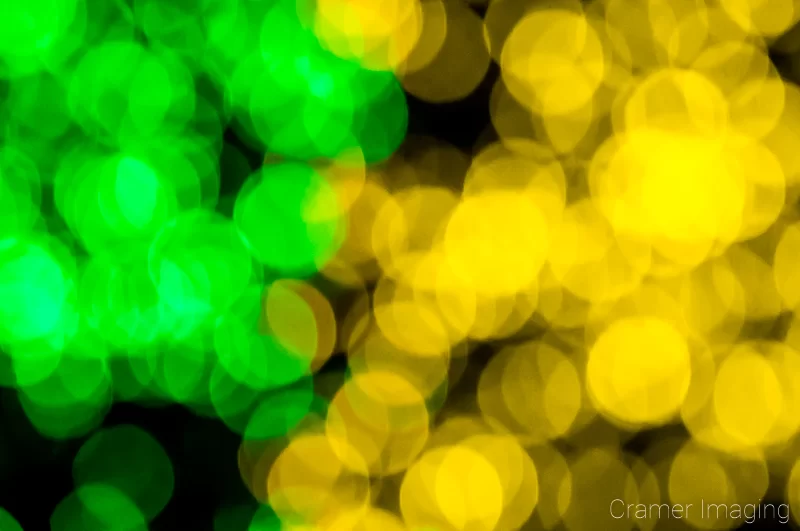
Alternatively, you can use manual focus to remove all focus from the image. To achieve this, you simply spin the focus ring in a direction to lose focus. This effect can create some interesting artistic photos if properly applied. A common (and beginner-friendly) way to use this technique is to deliberately blur Christmas lights, such as in the example below.
Your Takeaway
Manual focus is another tool in a photographer’s arsenal. It can be used to great effect. But it can also destroy a photo if misapplied. Beware of this photography advice online until you’re ready. However, if you want to shoot deliberately blurry photos, like the Christmas lights above, have at and have fun. That part of manual focus is easy for beginners.
You Must Travel for Great Photos
Another piece of photography advice you may find online is that of traveling for great photos. Indeed, if you’re into landscape photography, nature photography, wildlife photography, travel photography, adventure photography, modeling photography, certain types of sports photography, and more, then you will probably eventually run into this idea. It’s difficult not to fall for this idea as such beautiful photos from all over the world fill our social feeds. However, you must also beware of this online photography advice. It’s an illusion. There are photography opportunities everywhere but sometimes you need to look a bit harder to find them.
The Argument
Photographers tend to see the amazing photography others created and want their own version. So, many photographers focus their energies into exceptional places and neglect their local neighborhoods. Exotic places and creatures draw awe. Exotic places and wildlife sell. At least that’s the mindset. This mindset doesn’t exist without reason either.
The Justification
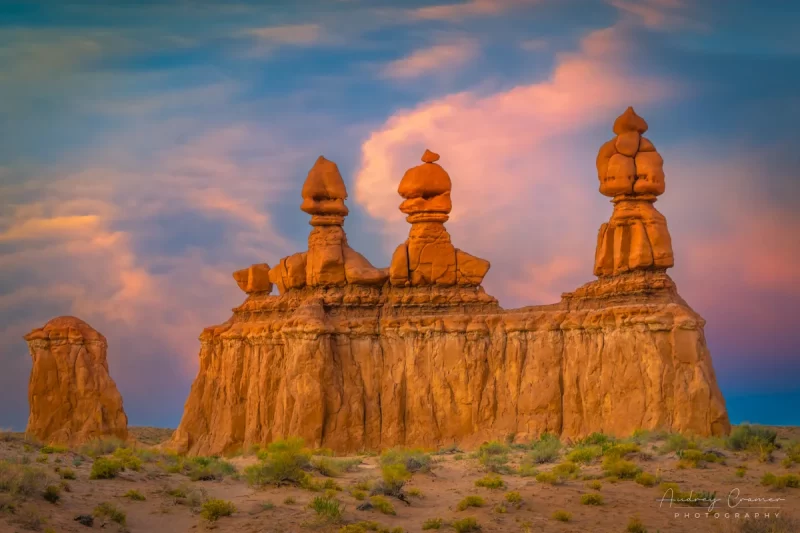
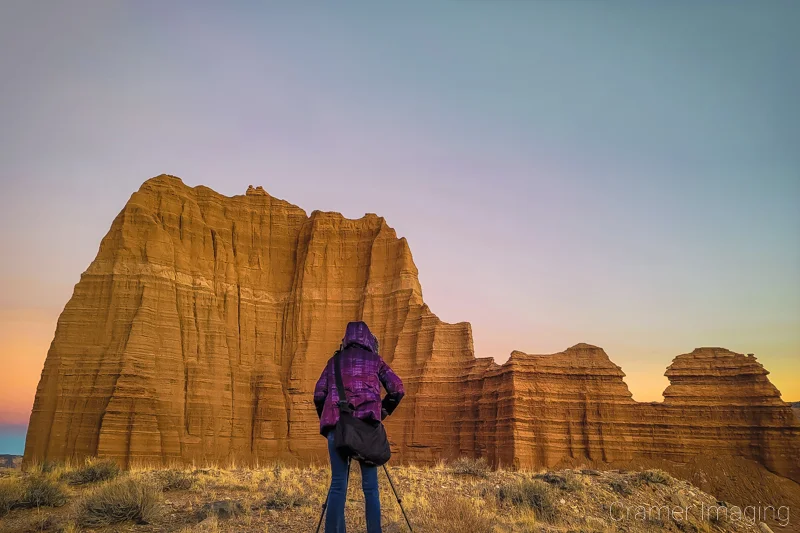
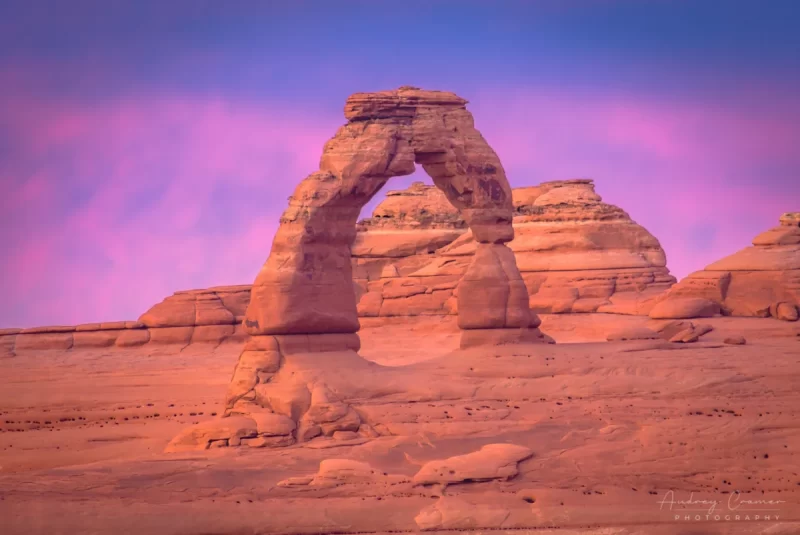
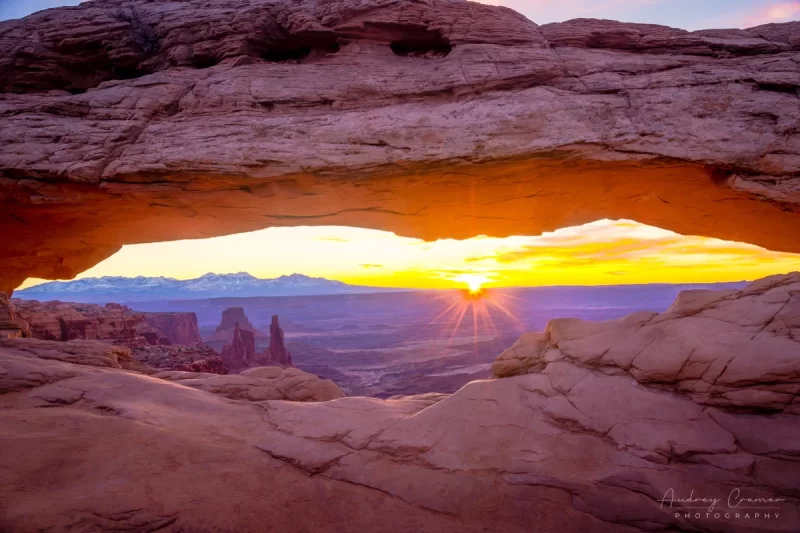
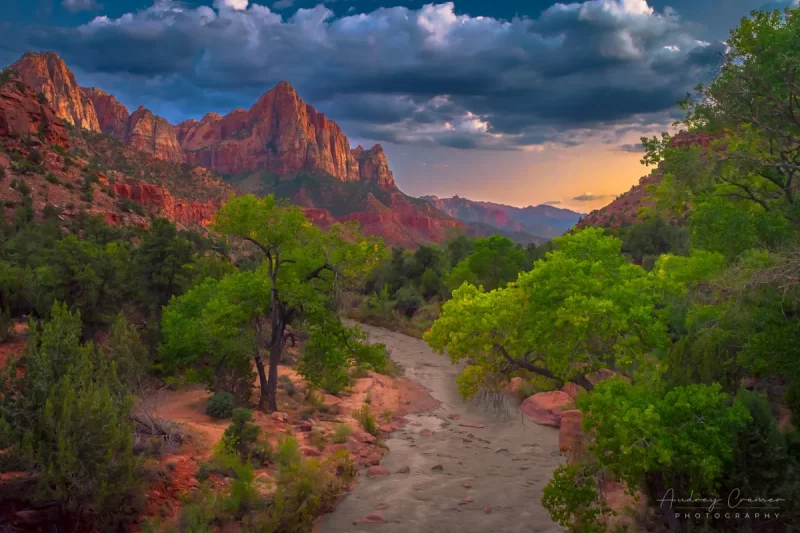
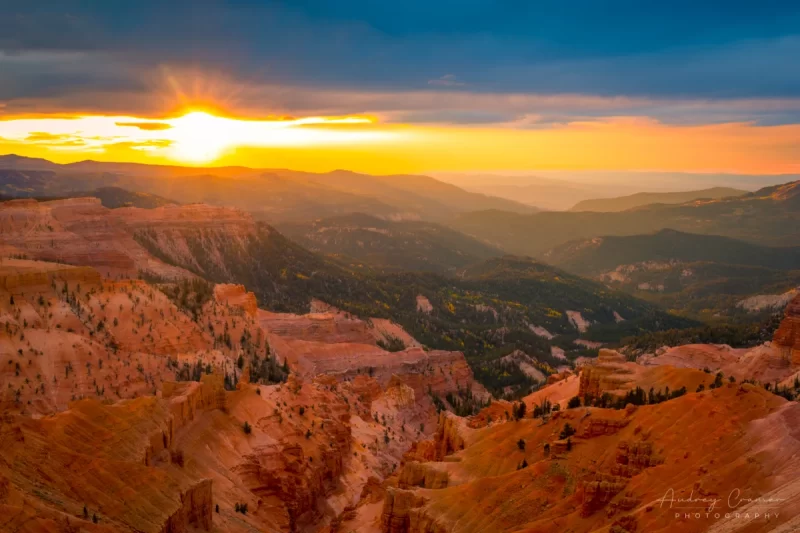
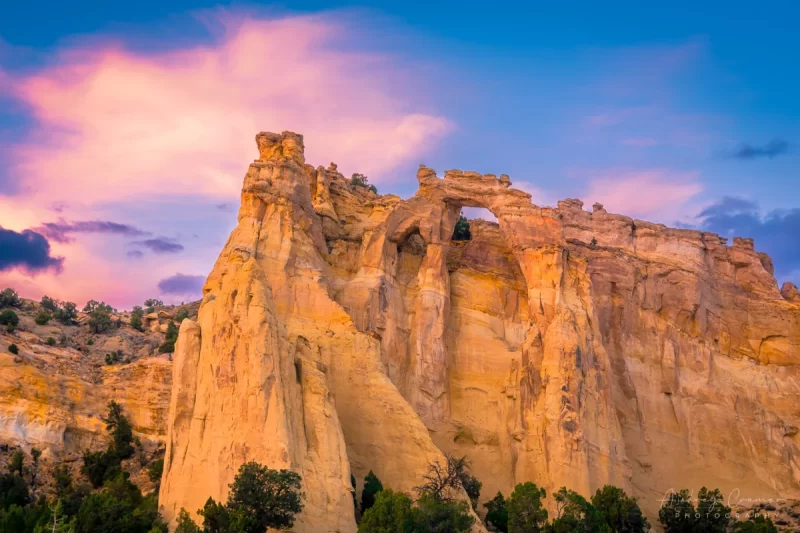
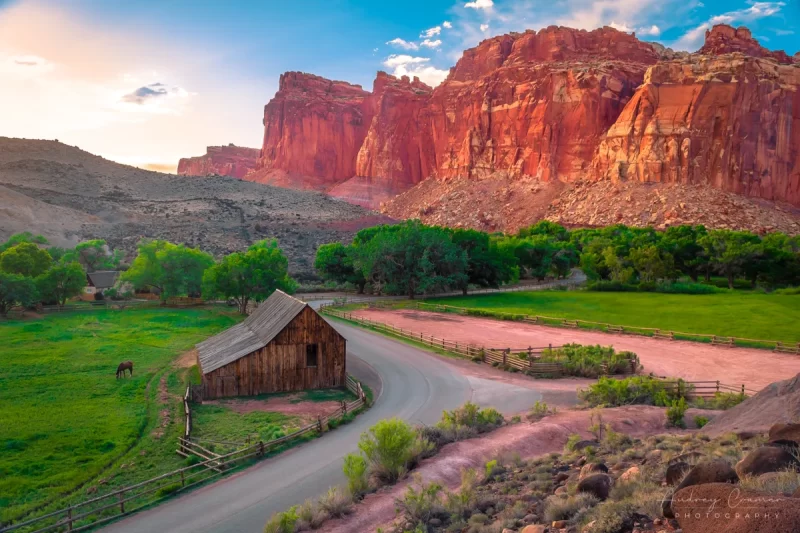
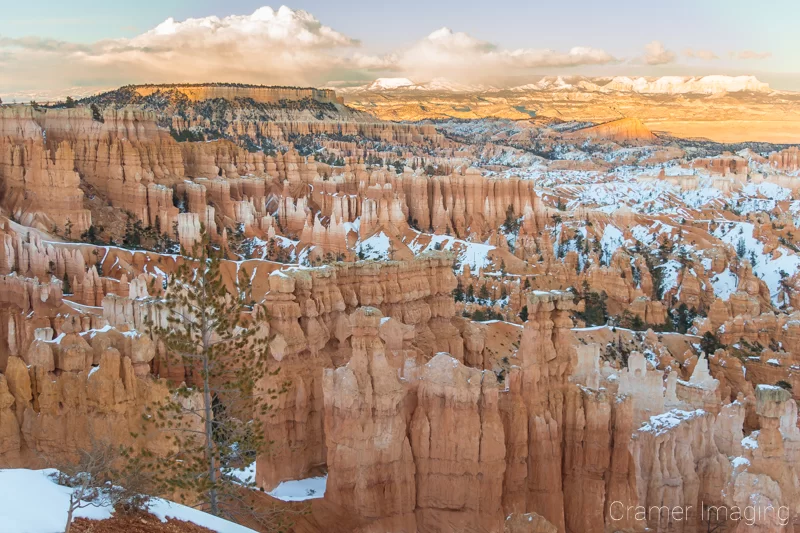
Here I have a small list of some world-famous landscape photography locations I’ve personally shot. There are more in my portfolio. I show these in particular as they are grouped rather close together. Indeed, they are considered important stops of the Grand Circle in the area. Lots of people make this loop within a week or so just to hit all the highlights and also fit the constraints of their vacation window.


The Counter Argument
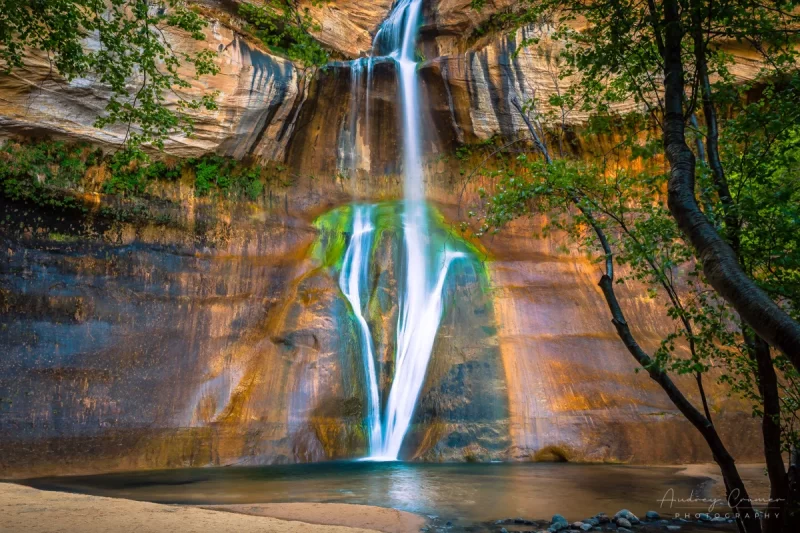
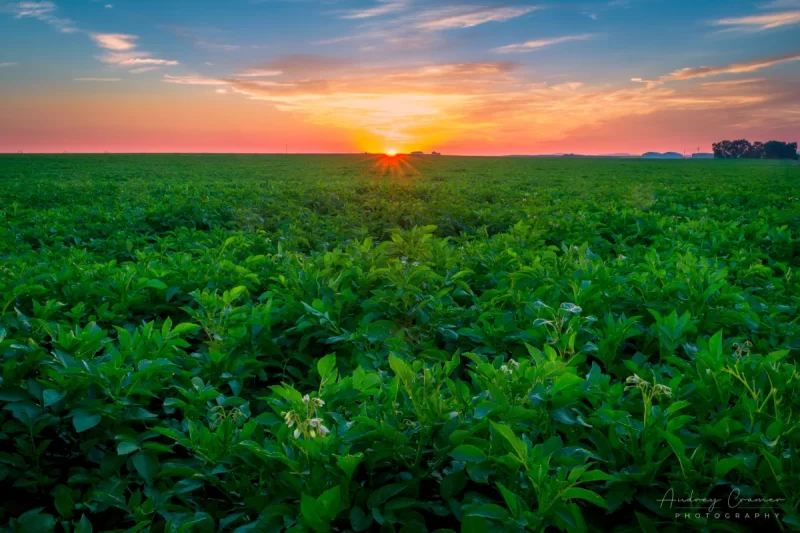
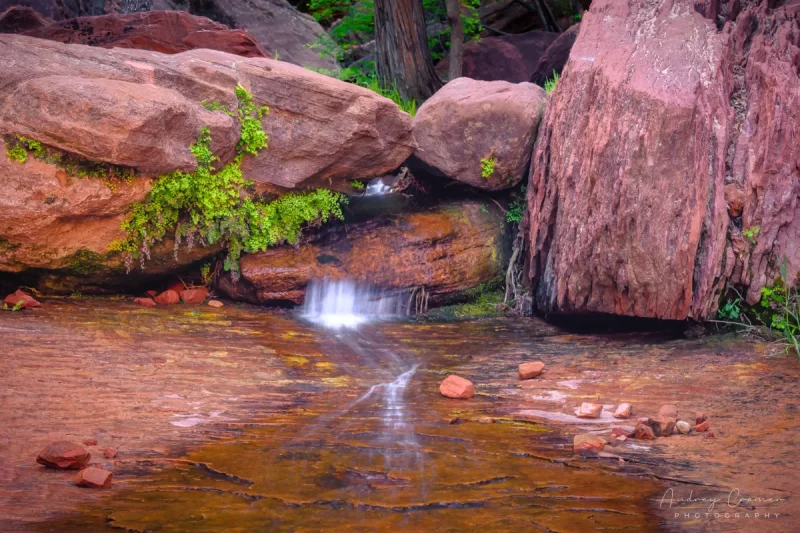
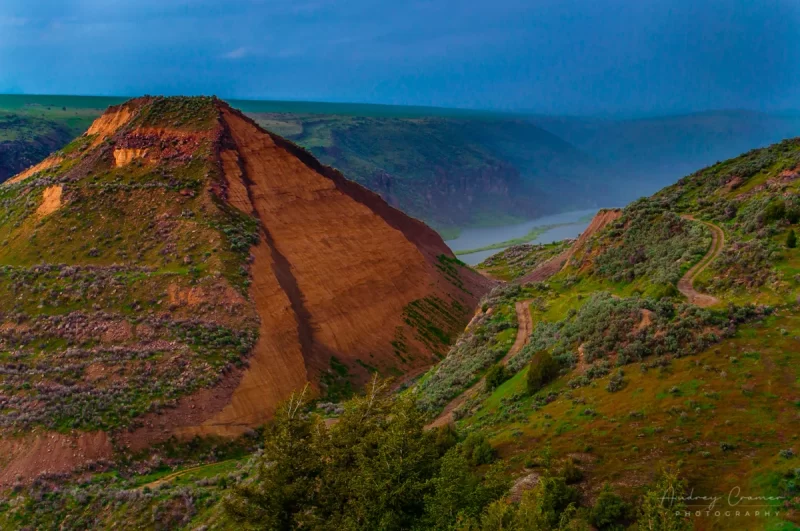
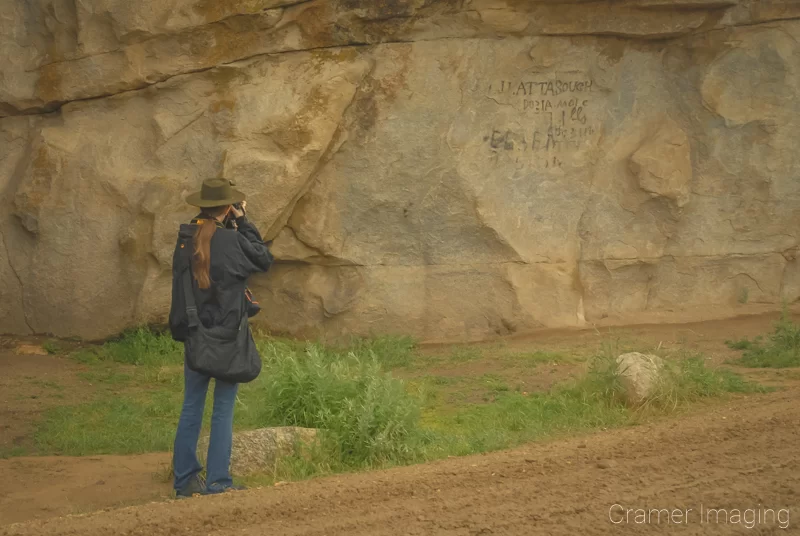
Indeed, living with this rich supply of landscape photography locations above, and plenty more unmentioned, I’m spoiled for choice (and I know it too). However, a few years ago (at time of writing), I used to live somewhere where I needed to look harder for places to photograph. So I do know the thought, research, and exploration needed to create a list of photography sites in a less supply dense area. Indeed, there are wild animals of all kinds, mountains, deserts, rivers, lakes, oceans, and all kinds of other subjects everywhere. Why do you need to travel to find such places as those above? Here are some lesser appreciated examples I found where I used to live.


These photos are stunning in their own right. One could argue they are just as stunning as those famous places above. The best part? I didn’t need to travel great distances to find them. They were in my metaphorical back yard.
Budget Concerns

When it comes to travel, budget is certainly a consideration. After all, you really cannot travel without spending some money to do so. If money is tight, then you really need to consider whether or not to make the trip for photos or not. Alternatively, if money isn’t so tight, then you can be more flexible.
If budget will pay a large part in your decision, then you should certainly consider staying behind. If you rush the photography trips before you’re ready as a photographer, then you probably won’t return with the photos you want. Your best bet is to improve your photography skills before you travel for photos. Then you can better guarantee the money and the photography trip will be worth it to you.
Your Takeaway
As you can see from above, you don’t need to travel to find amazing photography locations. Instead, you need a creative eye to see the potential in a “humdrum” scene right in front of you. I saw the potential of this scene below a full 2 years before I managed to capture it. I kept trying and trying until one day I happened to be there at the right time with my camera.
Indeed, you can find amazing scenes in your local neighborhood if you look hard enough. I know I have. Here’s an article where I show off several of these photos from neighborhoods. So, you really don’t need to travel to find great photos, especially if you are on a tight budget. Great photos are found everywhere. So, beware of this photography advice or inclination online. Instead, find those photos near you which will make others want to travel to your neck of the woods. Make your neighborhood into that stunning wow factor.
More Megapixels is Better
Eventually, if you stay in photography long enough, you will come across or develop the idea more megapixels in your photography is better. Many photographers, especially beginners and intermediates, believe the idea of improving their photography through expanding the megapixel count. There are indeed reasons why you might think this. However, once again, you do need to beware of this photography advice often found online in certain circles.
The Argument
There are certainly solid arguments in favor of more megapixels. These arguments include the ability to print much larger final prints without worries of the resolution breaking down or the image pixelating. Giant-sized images, such as this example below, and billboards are possible with higher megapixel counts. Upsizing images doesn’t always work as hoped, so the denser megapixel count really makes this possible.
Another argument is the ability to crop in a LOT and still retain decent resolution. Indeed, you will eventually run into situations (if you haven’t already as a photographer) where you wish you could zoom in more. Perhaps you cannot zoom more because you’re reached the end of your lens’ zoom power. Or, you might be shooting with a prime lens and cannot zoom with your feet. You can come up with more situations where you would want to zoom in more and can’t for reasons. If you increase your megapixel count, then you still have the flexibility to zoom in more while cropping. The higher the overall megapixel count of the original image, the higher the megapixel count during the crop and the better the resolution afterwards.
The Counter Argument
As there are arguments in favor of more megapixels, there are also arguments against more megapixels. Now, I’ll address some of those. Firstly, a bad photo is still a bad photo no matter how many megapixels you shoot it in. More megapixels is not a shortcut to good photography, specifically to properly-focused photos. Been there and believed that when upgrading from 12 to 24 megapixels. I hoped the upgrade would help, but it made no difference in my photography that way. If the photo is out of focus, more megapixels will not save the image. It will remain out-of-focus in 2 megapixels, 10 megapixels, or 100 megapixels.
The next argument against more megapixels is that of the sensor size in current cameras. Camera companies really haven’t improved the sensors in cameras for a while. In fact, there’s little difference between the camera sensors of today (at time of writing) and the last generation of cameras from 10+ years ago. If the sensors haven’t improved, then we must ask ourselves a very serious question: would more megapixels with the same sensor actually increase resolution or is this an illusion designed to sell more camera upgrades to photographers? The evidence suggests that the later argument might be reality.

The last argument I will cover is that of file size. If you increase the megapixel count of an image (no matter the image type), then you will increase the file size and the amount of space on your computer required to store it. This is the unavoidable trade-off with more megapixels. The bigger you make the file, the more space you need to store it. Does your current computer have enough space to store so many large files? Only you can know for yourself. Desktop computers can receive upgrades. Laptops cannot and must be replaced along with data transferred when there’s no longer room on the hard drive to hold data. External drives are an option, but they also fill up and require more drives to keep storing files.
In the end, 20-24 megapixel camera bodies provide plenty of pixels for a bit of cropping while still being able to deliver a perfectly acceptable 16×20 or 16×24 inch print. Most people don’t order much bigger than that general size range. Cameras in that megapixel range are also cheaper than those with 45+ megapixels. So, do you really need those extra megapixels? Only you can decide for yourself.
Your Takeaway
More megapixels is another case of situationally appropriate. There are times where it will come in handy, such as shooting for giant billboards. However, most of the time, you will not need them. Higher megapixel counts will not save bad photos but they will eat up more space on your computer. So, beware of this photography advice online.
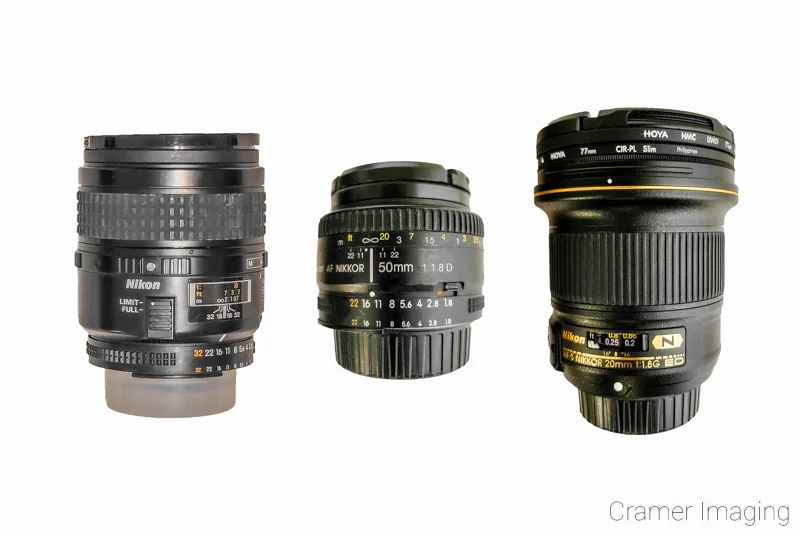
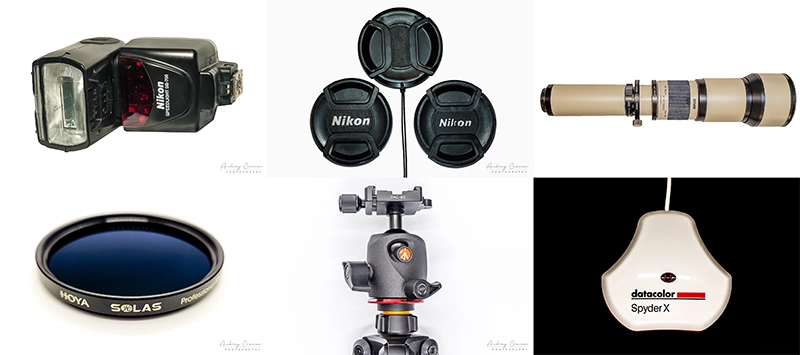
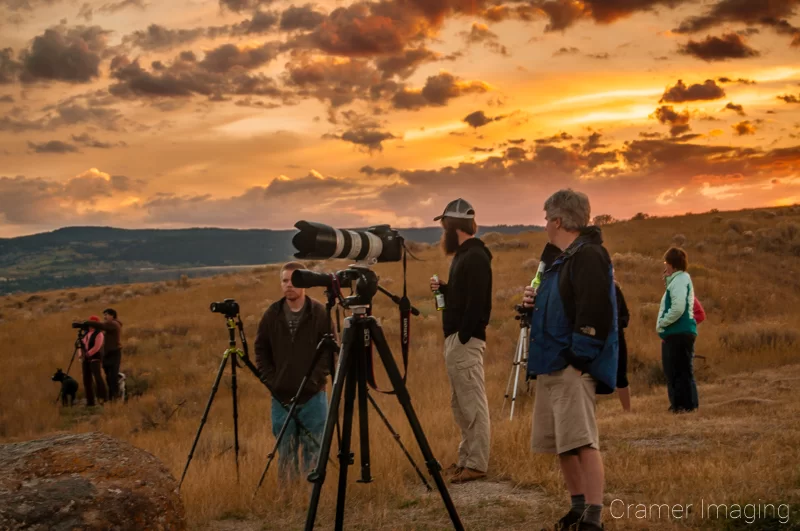
Buy This Gear Item
As you dive deeper into photography, you will eventually start figuring out what kind of photography you want to take. As soon as that happens, you will probably start stumbling upon the advice of buying certain gear for your photography. In fact, you may find some photographers, but more often equipment suppliers, heavily recommending particular type of equipment, specific piece of gear, or a line of equipment for your photography arsenal. This is also online photography advice you must beware of.
The Argument
Once you start figuring out what kind(s) of photography you want to pursue, then you will eventually start noticing gaps where your standard kit didn’t give you what you wanted. It’s only natural as kit gear is designed to lightly cover most photography, but cannot dive deeply into specific requirements. For example, perhaps your lens didn’t open up wide enough or zoom in far enough. Maybe onboard flash or removable flash doesn’t light your subject well enough. You might need a different bag or case to carry all your gear to a specific location or through the airport to an overseas destination. There are all kinds of reasons why you might need different and even specialized gear to capture the photos you want. I’m sure you can come up with some yourself.
If you have a vision which your current gear cannot realize for you, then it’s upgrade time. When in search of equipment capable of helping your realize your vision, naturally other more experienced photographers in your same space will know what gear will do the job the best. Their recommendations will obviously carry more weight, especially if said photographers have actually tried said equipment out themselves.
If you find you need certain gear, then it’s worth considering buying said gear for yourself. Then you can always access it if you find want it again.
The Counter Argument
There is a TON of gear out there for photography. There’s more equipment out there than you could possibly use. Much of the gear out there is for specialized uses. The more specialized the use, the less likely you are to use it in your everyday photography. Also, the more specialized the use, the higher the price tag often is.
I’m a photographer of several years (at time of writing). So, obviously, I tried out a few different types of photography when I started out. Indeed, I tried weddings and portraits along with some sports photography before finally deciding upon landscape and some nature photography as my chosen subject matter. As such, I also invested some money into equipment I would need for those other genres of photography.
Over time, I acquired a flash bracket, a backdrop, some light stands, a giant reflector, an extreme telephoto lens, and more. Do you know what is happening with all of that gear since I moved on towards my specialty? Absolutely nothing. All that gear is sitting around collecting dust and taking up space. That’s quite a bit of money which I tied up in now useless gear (at least for me).
Rather than pouring money into equipment which I wasn’t going to use in the end, I should have been learning to take better photos. None of that gear helped me take better photos in the end. Only practice did.
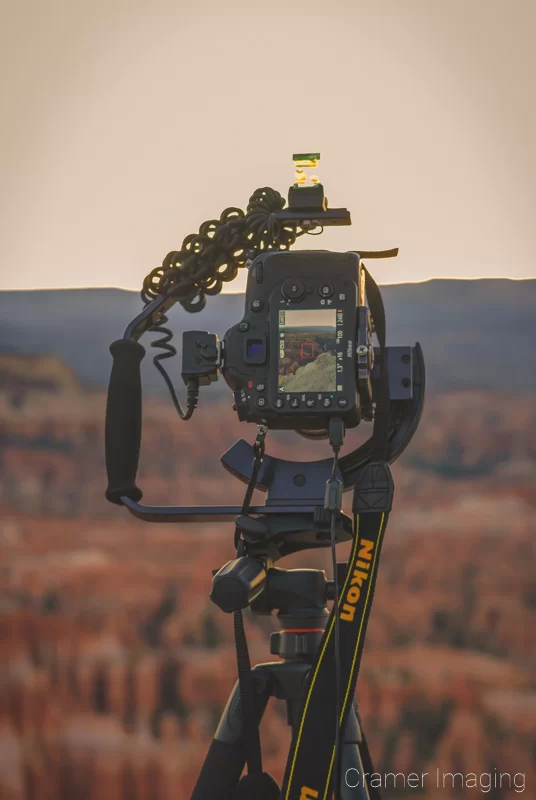
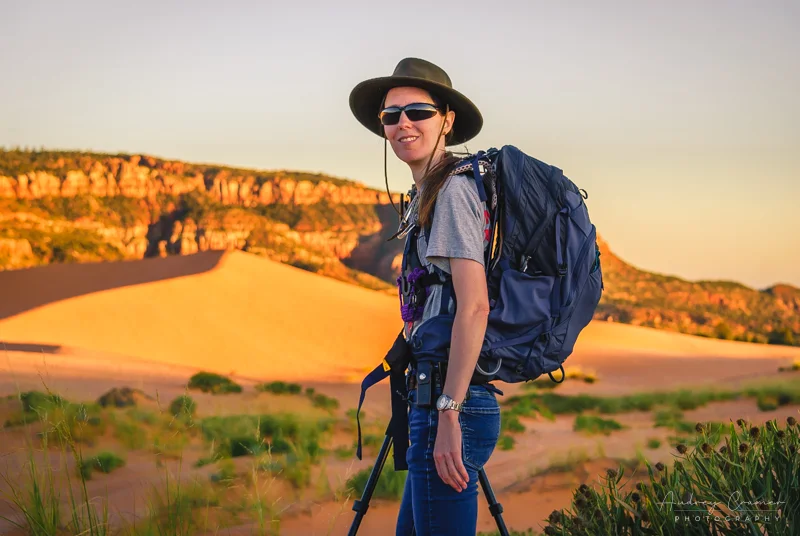
When I finally took the time to specialize in landscape photography, I ran into some limitations with my gear. These limitations included lenses which couldn’t open wide enough for astro work, a new tripod head to replace the worn-out head I had, and a good way to carry my camera on hikes without using the neck strap. I solved these problems and regularly use my new lens along with my camera harness system. These purchases were not a waste of money compared to the others mentioned above.
The Application
Compare some of these photos taken using the specialized gear like the flash bracket, the backdrop, and the giant reflector mentioned above …


… to these photos taken without such fancy gear. They were all taken using basic kit equipment after I learned how to take proper photos.

Your Takeaway
Gear upgrades can indeed assist your photography efforts. However, new gear is not a shortcut to taking great photos. You need to learn how to take great photos first. Then new and expensive equipment can help take your already great photography to new heights. So, learn how to shoot before you sink money into expensive gear which might just sit around and collect dust after you move on.
This is the “Only” Way to Do Photography
I must start off by saying that this particular point is not about how to make your camera do something (like silky water or night and astrophotography) which is outside its normal wheelhouse. For certain techniques, there is indeed a “right” way (or set of camera settings, equipment, etc.) to accomplish your photography goal. But that’s not what I’m referring to here. Instead, I’m talking about the aesthetic and artistic approach which photographers take with their photos.

That being said, this particular piece of photography advice may appear in 2 different forms online. It may take the form of actual advice saying something like “this is the only way” or “this is the true way” or even “Ansel Adams did it this way.” The other form it may take is that of comments talking about your actual photo execution. These comments might be lengthy or even as short as single word replies. Indeed, you must especially beware of this kind of online photography advice as you’ve probably run into a ‘purist,’ better known as a snob.
The Problem with ‘Purist’ Snobs
Snobs who wrap themselves in the title of ‘purists’ do indeed have something to contribute to the world. None of us should question that fact. However, sadly, their offerings are often limited. They rigidly pursue certain ideals and standards in their work, while often ignoring or even ridiculing alternative and possibly better options, in pursuit of being the best at their own ideal. These self-imposed standards are often narrow, complex, and even arbitrary. Their rigid thinking and adherence to these standards may lead to certain kinds of creativity, but it stifles them in many other ways. Even more sadly, they often like to push their limiting views onto other people. It doesn’t always seem to matter whether or not the advice is welcome.
An Example
For example, I’ve run into ‘purist’ snobs online who believe that Ansel Adams’ work is the ideal standard to work towards. There’s nothing inherently wrong about this idea. Their taste is their taste.
Indeed, Ansel Adams was a ground-breaker in fine art landscape photography. We have him to thank for blazing that trail so others could walk it behind him. Also, he did exceedingly well with his Brownie camera, filters, film, and dark room. He worked with the limits of the medium at his disposal and the technology available to create masterpieces. However, I have no doubts that, if he were born 100 or so years later, he would be shooting in color using digital cameras. He would be setting an entirely different standard for us. Then again, with how popular photography is now (probably at least partly thanks to him) and with how many photography masters we now have, he might not be seriously noticed at all.
Some of these ‘purist’ snobs seek so hard to be someone else (like Ansel Adams) that they are losing out on who and what they themselves are. Their unique vision of the world is lost and subsumed into another’s. If truly left to their own devices, what kind of photography would they pursue? Even they can’t answer that question.
Why You Should Ignore Advice from Snobby ‘Purists’

You should beware of and probably ignore snobby ‘purist’ online photography advice for one big reason. It will be destructive to you and your own early photography career. Imagine, if you will, just how discouraging it is to continually try and measure up to someone else’s arbitrary and capricious standards. You might give up on photography altogether. If you do not carefully sift though online photography advice, then that’s exactly where you may end up: quitting.
Sadly, snobby ‘purists’ are responsible for many people quitting on something they love just to rid themselves of the negativity. It’s an old story which keeps playing out.
However, if you want to pursue photography inside a very particular niche with exceedingly narrow perimeters with the goal of a very specific look to your photography, then these people might just be who you want to listen to after you reach a certain skill level. However, wait until you are no longer a beginner to refine your personal style in those kinds of directions.
How to Identify a ‘Purist’ or Snob Giving Advice
When identifying a purist, the important part to take note of is that we are talking about aesthetics, style, artistic approach, taste, and other subjective subjects; not more objective subjects such as how to create a panorama, how to create sun stars, and other techniques. We’re also not talking about specific critiques such as blown-out highlights or deep shadows where details are lost.
In these artsy situations, the advice giver will present their subjective opinion as the only “right” way to do something or approach photography in general. As stated above, you may run into arguments which resemble “Ansel Adams did it this way” or “this is the only way.” They may or may not provide substantial backing or evidence for their arguments.

You may also see a more antagonistic approach to this argument take the form of less than helpful criticism in the comments section. Comments of “fake” or similar might appear. While these comments don’t initially appear to apply here, the application comes when you receive elaboration from the commenter. If interacted with, they may reveal information about their thought process and beliefs in a reply which will fall under this heading. Oftentimes, they will not provide solid arguments behind their opinions. If you pay attention to what is said, you can discern that they have a taste objection, not an actual critique. Very rarely, they might even self-identify.
Your Takeaway
The term ‘purist’ in photography is not necessarily a positive moniker. Oftentimes, ‘purist’ is just another word for snob. Sadly, snobs are often quick to criticize, but not necessarily so quick to help or even offer legitimate critiques for improvement. Their often dogmatic rigidity to arbitrary and capricious standards in photography leads them down the road of being closed-minded. Sadly, they offer little in the way of helping you grow as a photographer. Rather, their input will often stifle your growth, discourage and dissuade you, and may even lead to your giving up on photography entirely.
Conclusion
In conclusion, there’ a lot of photography advice out there, especially online. However, you do need to beware of lots of online photography advice. Quite a bit of such advice involves advanced techniques which you, as a beginner, probably aren’t ready to try yet. More advice involves buying and using gear which you might not have the budget for. It’s also easy to disguise snobbery as advice. Such “advice” from snobs is actually detrimental to your growth as a budding photographer.
Sadly, there’s only 1 real way to distinguish such advice or “advice:” experience. That’s why I’m here. I want you to benefit from my several years as a photographer. I want to prevent the frustration and expense which might cause you to give up on a hobby which I love. Indeed, I hope that you will come to love it too. So, please beware of online photography advice especially. While it can help, it can also lead you down the wrong path.
I’ll do my best to not mislead you in my photography advice. But, do keep in mind, I cannot easily give you the feedback you might need specifically tailored for you. If you’re willing to trust the online photography advice I give, then check out my photography tips. I try and categorize my tips for beginners and more advanced photographers. See you there.